In this tutorial, we will explore Literate Programming in Emacs, showcasing various Hello World examples. For more insights on literate programming, refer to here and draw inspiration from here.
Download org file from this tutorial
Setting up Emacs#
- Clone the Spacemacs repository:
1
| git clone https://github.com/syl20bnr/spacemacs ~/.emacs.d
|
- Clone example dotfiles:
1
| cd $HOME && git clone https://github.com/imago/dotfiles.git dotfiles && cp dotfiles/.spacemacs .
|
Setting up Python dependencies#
Install python libraries in a virtual environment. Start emacs from this environment to provide python dependencies.
1
2
3
| python -m venv venv
source venv/bin/activate
pip install matplotlib R numpy
|
We assume GNU R is installed on machine, otherwise
Hello world example in org mode#
1
2
3
| #+BEGIN_SRC python :results output
print("Hello, World!")
#+END_SRC
|
Results:
Hello, World!
Explanation:
The code block above prints “Hello, World!” to the output.
Finding JPG files using shell command#
1
2
3
| #+BEGIN_SRC shell
find . -type f -name "*.jpg"
#+END_SRC
|
Results:
| ./jsMath/test/jsMath40.jpg                                                                               |
| ./literate_prog_emacs/venv/lib/python3.13/site-packages/matplotlib/mpl-data/sample_data/grace_hopper.jpg |
Explanation:
The shell script above finds all the JPG files in the current directory and its subdirectories.
Building Dockerfile using shell commands#
1
2
3
4
5
6
| #+BEGIN_SRC sh :results output
echo "FROM ubuntu:12.04" > Dockerfile
echo "RUN mkdir /home/hello" >> Dockerfile2
echo "COPY path/to/source/file /home/hello" >> Dockerfile2
echo docker build -t my-ubuntu .
#+END_SRC
|
Results:
docker build -t my-ubuntu .
Explanation:
The shell script above demonstrates building a Dockerfile for an Ubuntu base image. Here, the command docker build is not really executed :)
Setting variables in Emacs Lisp#
1
2
3
4
| #+name: my_name
#+begin_src elisp :exports results :results value
(setq my_name "Alicia")
#+end_src
|
Results:
my_name
: Alicia
1
2
3
4
| #+name: my_age
#+begin_src elisp :exports results :results value
(setq my_age 30)
#+end_src
|
Results:
my_age
: 30
Using variables in a Python code block#
1
2
3
| #+begin_src python :exports both :var my_name=my_name my_age=my_age :results output
print(f"Hello, my name is {my_name} and I am {my_age} years old.")
#+end_src
|
Results:
Hello, my name is Alicia and I am 30 years old.
Explanation:
The Python block above uses variables to greet the user with their name and age using variables from previous lisp code blocks.
Extracting and processing properties in Emacs Lisp and Python#
Properties:
:PROPERTIES:
:foo: 10011
:bar: 32
:barz: 123
:END:
Explanation:
The section above contains properties such as foo, bar, and barz.
 1
 2
 3
 4
 5
 6
 7
 8
 9
10
| #+name: properties
#+begin_src emacs-lisp :exports results :results value
;; Extracting properties as an alist
(setq props (org-entry-properties (point)))
;; Converting the alist into a string format for Python
(setq props (mapcar (lambda (entry)
(concat "" (car entry)" : " (cdr entry) ""))
props))
#+end_src
|
Results:
| CATEGORY : test | BARZ : 123 | BAR : 32 | FOO : 10011 | BLOCKED : | FILE : /Users/imago/workspace/test.org | PRIORITY : B | ITEM : Ein Abschnitt mit einer Property |
Explanation:
The above block extracts and converts properties into a dictionary format for Python.
 1
 2
 3
 4
 5
 6
 7
 8
 9
10
| #+begin_src python :var props=properties :results output
# Using all properties as a dictionary
props_dict = {}
for entry in props:
key, value = entry.split(" : ")
props_dict[key.strip('"')] = value.strip('"')
print("Properties as a dictionary:")
for key, value in props_dict.items():
print(f"{key}: {value}")
#+end_src
|
Results:
Properties as a dictionary:
CATEGORY: test
BARZ: 123
BAR: 32
FOO: 10011
BLOCKED:
FILE: /Users/imago/workspace/test.org
PRIORITY: B
ITEM: Ein Abschnitt mit einer Property
Best practice for configuration in Python#
 1
 2
 3
 4
 5
 6
 7
 8
 9
10
| #+name: config
#+begin_src python :exports none
# Defining the configuration
import json
config = {
"variable1": "ValueA",
"variable2": "ValueB"
}
return json.dumps(config)
#+end_src
|
Results:
{"variable1": "ValueA", "variable2": "ValueB"}
1
2
3
4
5
6
7
8
| #+name: print-config
#+begin_src python :exports results :var config=config :results output
import json
config = json.loads(config)
# Processing the configuration
for key, value in config.items():
print(f"{key}: {value}")
#+end_src
|
Results:
variable1: ValueA
variable2: ValueB
Explanation:
The blocks above show how to define and process configuration settings using JSON in Python.
More advanced examples#
This is an example of inline code blocks.
The result is (/ 100.0 pi arg).
1
2
3
4
5
6
7
| #+NAME: ___DieWahrheitIst
#+BEGIN_SRC emacs-lisp :exports none :eval no-exports
(* 21 2)
#+END_SRC
#+RESULT: ___DieWahrheitIst
42
|
1
2
3
4
5
6
7
| #+NAME: ___DieGanzeWahrheit
#+BEGIN_SRC emacs-lisp :var wahrheit=___DieWahrheitIst :exports none :eval no-exports
(print wahrheit)
#+END_SRC
#+RESULT: ___DieGanzeWahrheit
42
|
The truth is print wahrheit.
1
| #+CALL: ___DieGanzeWahrheit()
|
The truth is a number, and its value is call____DieGanzeWahrheit().
Here call_ AND the method need to be invoked.
1
2
3
4
5
6
7
| #+NAME: py4tblformula
#+BEGIN_SRC python -n -r -k :var arg1=0 arg2=0 :exports none :eval no-export
return (arg1 * (arg2**2))**(1/2)
#+END_SRC
#+RESULT: py4tblformula
0.0
|
1
2
3
4
5
6
7
8
| | Wert 1 | Wert 2 | Ergebnis |
|--------|--------|----------|
| 1 | 2 | 2.00 |
| 2 | 4 | 5.66 |
| 3 | 6 | 10.39 |
| 4 | 8 | 16.00 |
| 5 | 10 | 22.36 |
TBLFM: $3='(org-sbe "py4tblformula" (arg1 $1) (arg2 $2));%.2f
|
 1
 2
 3
 4
 5
 6
 7
 8
 9
10
11
12
13
14
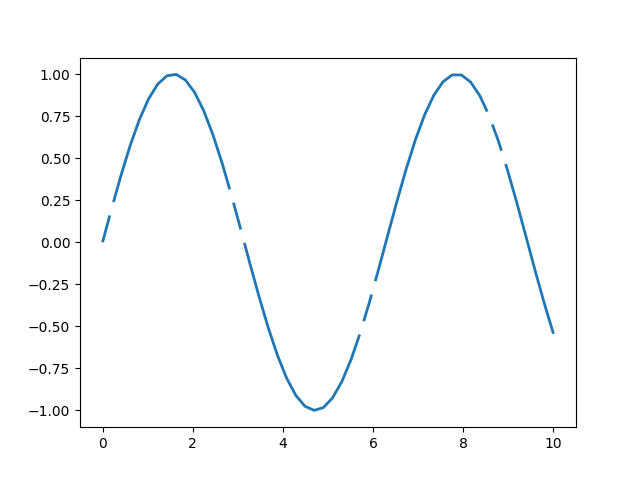
| #+BEGIN_SRC python :results output
import numpy as np
import matplotlib.pyplot as plt
x = np.linspace(0, 10)
line,= plt.plot(x, np.sin(x), '--', linewidth=2)
dashes = [10, 5, 100, 5] # 10 points on, 5 off, 100 on, 5 off
line.set_dashes(dashes)
plt.savefig("./matplot-exercises.png")
plt.savefig("./matplot-exercises.pdf")
print("matplot-exercises saved!")
#+END_SRC
RESULTS:
matplot-exercises saved!
|

R-Plot mit org-Mode#
1
2
3
4
5
| #+BEGIN_SRC R :session :exports both :results output graphics :file plot.png
x <- seq(-pi, pi, length.out = 50)
y <- sin(x)
plot(x, y, type = "l", col = "blue", lwd = 2, main = "Sine Wave", xlab = "x", ylab = "sin(x)")
#+END_SRC
|
RESULTS:


